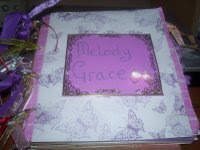
paper bag albums

after being asked about this a lot i decided to post on how to make a paper bag album
Basic Paper Bag Album instructions - Step by step directions
Materials - 3 Paper Bags (any size)- Hole punch tool- Eyelets, book rings, ribbon or fibres to bind- lots of good stuff to cover and embellish your pages
1. Take your 3 paper bags and lay them on top of each other alternating the ends.

Basic Paper Bag Album instructions - Step by step directions
Materials - 3 Paper Bags (any size)- Hole punch tool- Eyelets, book rings, ribbon or fibres to bind- lots of good stuff to cover and embellish your pages
1. Take your 3 paper bags and lay them on top of each other alternating the ends.

each other alternating the ends.
2. Fold them in half to create a book. Notice how the three open ends each form a pocket.
Punch three to five holes along the spine.

3. Set an eylet in each hole and / OR thread a couple of lengths of ribbon or fibre (or a combo of both!) through each hole and tie off. 4. Decorate your album as you choose using a variety of papers, embellishments, ribbon and any other creative elements in your scrapbooking stash.

 4. Decorate your album as you choose using a variety of papers, embellishments, ribbon and any other creative elements in your scrapbooking stash.
5. Create at least 3 large tags slightly smaller than the album itself to fit into the three pockets formed by the paper bags. Use them to hold extra photos or journalling.

you can buy these from ebay all made up and ready to decorate. just put "paperbag albums " in the search!

you can buy these from ebay all made up and ready to decorate. just put "paperbag albums " in the search!
Happy scrapping!

1 Comments:
i love this idea i think im gonna try this xx
Post a Comment
Subscribe to Post Comments [Atom]
<< Home